This article describes how to use the Sangoma Talk app (Talk) with Switchvox. Talk enables an iPhone or an Android phone to be used as a phone with a Switchvox PBX.
Before you can use Sangoma Talk, your Switchvox admin will need to ensure that your extension is correctly set up to use the app.
If you are a Switchvox on-premises admin and want your users to be able to use Sangoma Talk, see How to Set Up and Manage Switchvox for Sangoma Talk .
For security reasons, if you do not have any call activity within 7 days, the Talk app will prompt you to verify that you are still using it. If you are not actively using the app, your credentials will be removed from the push servers and you won't receive notifications of incoming calls. To remedy this, simply open Talk (or respond to the prompt to verify use of the app). That causes the app to again register and receive incoming-call notifications.
Configuring Sangoma Talk
Talk can be configured for Switchvox using the invitation email.
Prerequisites
To use Talk with Switchvox, you need:
- Sangoma Talk downloaded to your iPhone or Android phone.
- Access to the email messages associated with your Switchvox extension.
- A Sangoma Talk assignment from your Switchvox administrator.
Configuring the App
On the mobile phone, open the invitation email.

If your Switchvox administrator did not trigger an email invitation for you, you can download the app from the store, and request the invitation email.
To request an invitation email:
- Download the Sangoma Talk app from the store.
- Open the Sangoma Talk app.
- Enter your email address.
- Tap the Send button (the arrow).

On the mobile phone, open the invitation email.
In the invitation email, tap the Login link. The app opens, and is logged into the extension that has this email address attached.
Basic Navigation
Quickdial - Use a favorite to create speed dial entries and BLF buttons
History - see your inbound and outbound call history
Keypad - conventional 10 digit *# phone dial entry
Contacts - Alphabetical list of contacts
Outgoing Calls
Select the Keypad and enter the digits to the destination number and press the green call button at the bottom. Or, you can use Quick Dial, History, or Contacts to place a call.
Incoming Calls
For an inbound call, you can:
- answer the call
- ignore the call which stops the ringing stops but still gives you a chance to answer
- reject the call so it goes to the failover destination
Call in Progress
During an active call, you can mute the mic and toggle hands free audio. At the center is a Keypad button to enter DTMF, a Hold button and transfer buttons.
Call Transfers
Blind Transfer - To transfer a live call to another destination without first interacting with recipient of the transfer, tap the Transfer button. The caller will immediately be put on hold and hear hold music. You will be presented with the keypad where you enter the digits for the transfer destination. Press the green dial button at the bottom to complete the transfer.
Attended Transfer - To transfer a live call to another destination and first speak privately with the recipient of the transfer, tap the Att Transfer button. You will be presented with the Keypad where you can dial the destination of the transfer. Press the green dial button and the app will initiate a call to the transfer recipient while the original call remains on hold. When finished talking with the recipient, press the green Transfer button to complete the transfer, or press cancel to abort the transfer.
3-way Calling
To add an additional party to an existing live call, tap the 'Add' button. The existing call will be placed on hold and you will be presented with the Keypad where you can place a new call. Once the second caller answers you can press the 'Join' button so that all three parties can speak together. 3-way calling and video cannot be used together; video calls are for local call between 2 parties.
Local Video 1:1 Calling
To add video to an existing live call with another Talk user, tap the video camera icon. Video calling is just for one-to-one calling, it cannot be used with 3-way calling. You can also start a video call by tapping the video camera icon for a contact (or, in Quickdial, tap and hold the item to bring up a tools menu). Your PBX must be set up correctly to use video calling; please see your PBX administrator if video is not working in Sangoma Talk.
DND Mode
To manually silence all incoming events on Sangoma Talk, you can access the DND mode from the extension number button at the upper left:
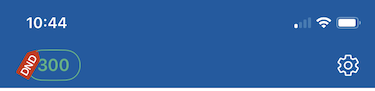
This will open up a dialog that provides a toggle for DND. Outbound calls work as normal but inbound calls will not ring thru to the App. DND will be displayed in red near the extension number at the top of the screen. The same method is used to toggle off. If you have other devices registered to your PBX user account, they will not be affected by this Talk DND setting.
History
To view Inbound and outbound activity, tap the History button while the App is idle.
Quickdial
To create a speed dial button or a BLF button, tap the Quickdial (star) in the navbar. In Edit mode, tap the + icon. You can enter a button title and the dialed digits, or tap the Contacts icon to find and use a contact for this item. To add a "Busy Lamp Field" (i.e. indicate if the local extension number is in use or not, use the BLF toggle. Tap Save, to complete the item, or Cancel to go back to the list without creating a new item. To edit or delete items, tap Edit. To show only avatars (with no names), pull down on the list screen.